 HUVA
Workflow guides
On this page
Choose the form sent after eligible appointment calls
Publishing a form and selecting it for automatic delivery are separate steps.
The saved selection appears under Automatic patient form. The form card in Your forms is marked Automatic form.
Before you begin
Where: Settings → Patient forms
- Publish the intended form first.
- Review the receptionist’s appointment follow-up wording.
Select the published form
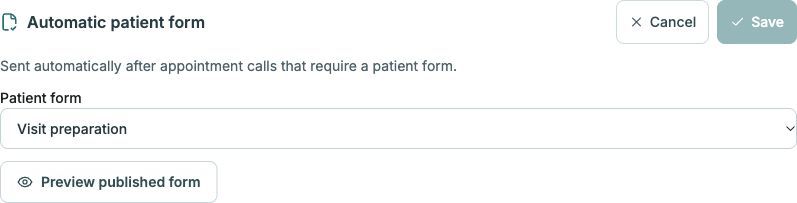
- Open Settings → Receptionist → Call handling → Automatic patient form.
- Select Edit.
- Choose the published form in Patient form.
- Select Save.
- Open Preview published form and confirm the content.
Check the result
The saved selection appears under Automatic patient form. The form card in Your forms is marked Automatic form.
Understand when it is sent
The follow-up SMS can include the selected form when an eligible appointment call creates a linked appointment request awaiting staff review. It is not sent after every type of call. The appointment request still needs staff confirmation. New requests use the selected form’s latest published version.
Stop attaching the questionnaire
- Select No automatic form in this setting.
- Save and verify the selection.
Details
Appointment follow-up messages may continue after the automatic questionnaire is turned off.
Troubleshooting
No form is available to choose
Confirm the form has been published, not only saved as a draft.
A call did not send a form
Check whether it created an eligible linked appointment request and whether the correct form is selected.
Source and product scope
Reviewed 2026-10-20. Editorial source: Notion guide.
Examples use fictional or redacted details or an eCW training chart. Follow your clinic’s permissions and current on-screen instructions. HUVA Scribe is a separate Chrome extension; open the intended Progress Note in the supported EHR. Confirm availability for your clinic with HUVA.